How to Add a Widget Below First Post in Blogger
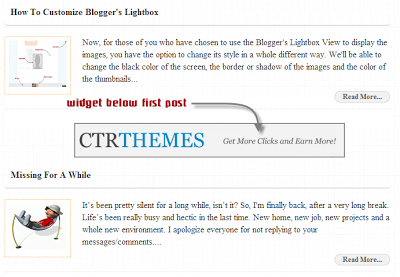
This tutorial will show you how to make a gadget/widget to appear just below the first Blogger post.
First, you must understand that the usual gadgets provided by Blogger can be added only where the design section allows this. Yet, we can show any element, for example, an AdSense ad, an image, a flash file or a video etc...
So, what we will do in this tutorial is to display an element under the first post, this means that it will not be visible below the other posts. This is great when you use any automatic summary, although it is not a requirement.
This is easy to do and we will use the isFirstPost conditional tag for that element to show it under the first post published on our blog.
Step 1. From your Blogger dashboard, go to Template and click on the Edit HTML button:

Step 2. Click anywhere inside the code area and press the CTRL + F keys to open the Blogger search box

Step 3. Type or paste this line below inside the search box and hit Enter to find it:
- The bolded text indicates to where you should paste the code of the element (eg. AdSense ad, a widget).
- In red are the top margins (margin-top) and the bottom margins (margin-bottom), this is in case you want the element to move towards or away from the entries, also you can add any style like a background color, border etc..
Step 5. Preview to make sure everything is ok, then Save your Template by clicking on the Save template button. That's it!
First, you must understand that the usual gadgets provided by Blogger can be added only where the design section allows this. Yet, we can show any element, for example, an AdSense ad, an image, a flash file or a video etc...
So, what we will do in this tutorial is to display an element under the first post, this means that it will not be visible below the other posts. This is great when you use any automatic summary, although it is not a requirement.
This is easy to do and we will use the isFirstPost conditional tag for that element to show it under the first post published on our blog.
Adding A Gadget or Widget Below First Post in Blogger
Step 1. From your Blogger dashboard, go to Template and click on the Edit HTML button:
Step 2. Click anywhere inside the code area and press the CTRL + F keys to open the Blogger search box
Step 3. Type or paste this line below inside the search box and hit Enter to find it:
<b:include data='post' name='post'/>Step 4. Just below it add this code:
<b:if cond='data:post.isFirstPost'>Note:
<div align="center" style="margin:10px auto;">
Here goes the code of the element you want to show
</div>
</b:if>
- The bolded text indicates to where you should paste the code of the element (eg. AdSense ad, a widget).
- In red are the top margins (margin-top) and the bottom margins (margin-bottom), this is in case you want the element to move towards or away from the entries, also you can add any style like a background color, border etc..
Step 5. Preview to make sure everything is ok, then Save your Template by clicking on the Save template button. That's it!
How to Add a Widget Below First Post in Blogger
 Reviewed by Anonymous J
on
14:18
Rating:
Reviewed by Anonymous J
on
14:18
Rating:
Reviewed by Anonymous J
on
14:18
Rating:
No comments: